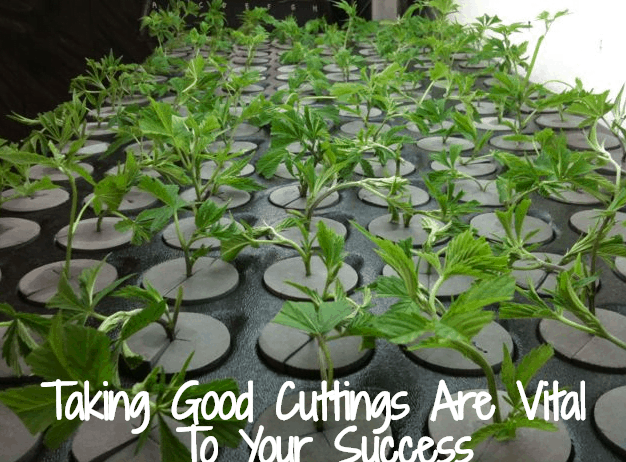
Taking Good Cuttings Are Vital To Your Success
What is a cutting?
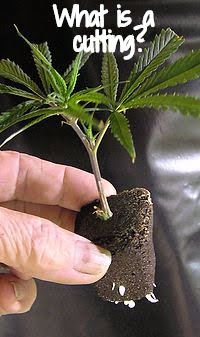 A cutting (also known as a clone) is a 100% genetic copy of a plant. Quite simply put (we’ll go into more detail later) it’s the process of cutting off a small part of a plant, keeping it in a warm, humid environment, allowing it to form root of its own, and thus turning it into a new plant!
It’s a bit like chopping off one of your fingers and growing another you! A scary thought indeed. But it works for lots of plants! So, in the case of our Number One plant, you could have a whole grow room full of the little lovelies!
All of them equal in shape and height and… all the other factors I mentioned! Just imagine how great it feels to see your best specimen replicated again and again and again?
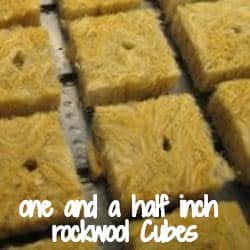 You can root your cuttings in a whole variety of mediums but my personal favorite is rockwool. It comes ready in 3.6cm (one and a half inch) cubes so you don’t need to bother filling dainty little containers for each cutting you want to take.
You can fit about 35 in a standard sized propagator using a ‘ chessboard’ formation to give each cutting a bit of breathing space.
Pre-soak your growing medium in 1/4 strength nutrient solution (you really only need to show it the bottle really!) and pH adjust to 5.5 for rockwool, or 6.0 for coco and most other media.
Sterilize everything (scalpel, shot glass, propagator) before you start. Wash your hands pour enough rooting hormone into your shot glass so that you can dunk cuttings in.
The Method.
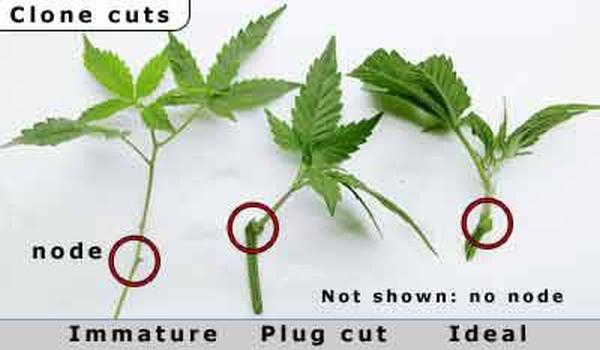
1.Using the above diagram as your guide, find a small branch with a growth tip on it With your sharp blade, remove the cutting from the mother plant, cutting through the branch at a 45 degree angle. Try to leave some clean, bare stem to insert into the growing media.
What equipment do I
need?
A sharp blade. The sharper the better. You can usually buy disposable scalpels at your local growshop.
A small container. A shot glass is ideal.
Most growers use a small amount of growing medium to root their cuttings.
This could take the form of a rockwool cube, Jiffy pellet, or some coco coir in small net pots.
Propagator or humidity dome.

Rooting hormone. Many brands will be available at your local growshop. They usually come in powder or gel form. I find the gels are easiest to work with.
Solvent / alcohol (vodka will do, white spirit is better)- this is for cleaning the blade.
If you are taking clones from more than one plant you should invest in some plastic plant labels and a permanent marker so you can easily identify where a cutting came from.
2. Quickly insert the cutting into the rooting hormone. If you are using a gel hormone then just a quick dip is sufficient. If you are using a liquid-based hormone allow a little longer for the hormones to soak in. Work quickly
because the moment you remove a cutting it’s obviously disconnected from the root system and is unable to sustain itself.
3. Carefully insert the cutting into the growing medium.
You need to push the cutting in deep enough so that it is stable, but not so deep that it penetrates out the bottom of the medium. If you bend or bruise the cutting as you insert it, I’d recommended discarding it. You need to be firm but gentle.
4. Place in a propagator and get the lid on quick! You don’t want your tender, super-delicate fresh new cuttings drying out on you, do you? Make sure that any vents in the propagator lid are closed. Once you’re done taking cuttings put your propagator in a place with moderate light, such as the far corner of a growroom or under a single florescent tube,
5. Opinions differ on the care and maintenance of cuttings. Some growers remove the propagator lid and spray their cuttings as much as two or three times a day. I really don’t think this is necessary at ail! In fact,I never spray them! It’s going to depend on what sort of plant you are taking cuttings from of course -but my advice is, see how they get on without spraying.
It’s all too easily make things too wet for your cuttings and invite mould and fungus problems. Once you pop that propagator lid on and place in a warm environment, the moisture in the growth
media will create lots of humidity for your cuttings. You’ll see your propagator lid quickly steam up. That’s a good sign! Don’t worry if the cuttings wilt initially. Be patient, they’ll perk back up eventually!
6. I keep my cuttings at about 25°C. Remove the propagator lid once a day to check in on the little’ns. Remove any
excess moisture from the bottom of the propagator. Again, some growers will tell you to keep spraying your cuttings. And again,I say don’t bother! The important thing is to keep the humidity up by making sure the propagator lid is on properly and the growth media doesn’t dry out.
7. Your cuttings are going to need light but nothing too intense. Indoors you can use a single fluorescent tube fixture with both a cool white bulb and a warm white bulb in the fixture (or two “grow” tubes).
8.You need to keep your cuttings moist, but not sopping wet- you don’t want to invite stem rot do you? Ifind that my cuttings are fine for four or five days in their rockwool cubes before a dip is required. I use 1/4 strength general
purpose hydroponic fertiliser solution. Don’t forget to adjust the pH of the water / nutrient solution (5.5- 5.8 for rockwool, 6.0 for coco coir.).
9. Periodically check your cuttings for root development. You should see little white roots appearing out of the growth media. Cuttings tend to suddenly become a lot more thirsty at this stage so you’ll need to dip them every day or so, or transplant them into a hydro system / pot. I try and wait until there are quite a few roots, not just one or two before taking them- out of the prop
10.If you observe some of the lower leaves starting to go pale green to yellow and wither away, don’t worry, it happens all the time and is just part of the process. The cutting is sustaining itself by transporting nutrients and moisture from the older growth to the tips. However, always remove any totally dead foliage promptly as this can invite mould.
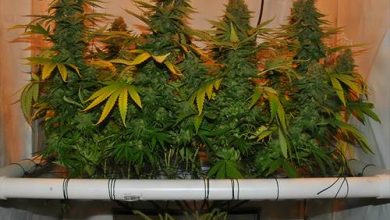
11. When the cuttings are completely rooted you can move them into your hydroponic.system, small pot, or what have you. Keep a close eye on your newly emerged cuttings. Position HID lamps further away for first day or so whilst your cuttings adjust to life outside of the propagator.
The less stress your cuttings have to endure the more they can concentrate on becoming big and strong and producing super yields! So by now you should have a grow room filled, not just with random genetic pot-luck plants from a seed packet, but with row after row of your Number One plant!

I put an Autopot float valve and wrapped 1 inch insulation in wicking mat as a nice transitioning stage any size tray.