How To Graft Cannabis and Keep Multiple Strains. Hello, the following tutorial will give you the basics for grafting your favorite cannabis strains onto a mother plant. There are many reasons you might want to have several strains on one plant. It could be simply to save space and lighting.
The one really big bonus is you can flower one plant but have a harvest which includes two or more of your favorite strains!. Or you might have a plant limit on the number of plants you are allowed to grow.
In any case here is the lowdown on how to create your own multi-strain cannabis mother plant.
- Approximate time: 5 minutes to do the transplant.
- Ten days for the graft to take.
- Tools needed:
- clean razor or scalpel blade
- cyanoacrylate glue (super-glue )
- plastic bag 0.5-1L

Required Materials (Consumables):
– One plant to use as the mother plant.
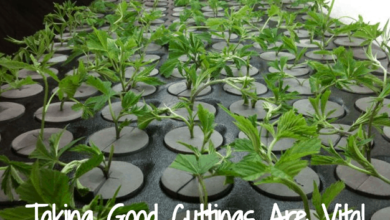
– A cutting from another cannabis strain, (sized to approx match the mother plant).
- Cost: The price of the superglue and the plastic bag.
- Difficulty: Easy.
Grafting Methods
This is one of many ways to graft cannabis but this method has the advantage of requiring very few materials and is very easy to do.
The principle of grafting in horticulture is often used to get the properties of a rootstock (root vigor, adaptation to a particular soil, resistance to drought) to that of the graft (fruit size, better flavor etc).
A good example of this is in the case of the grapevine since currently almost all the vines grown in France are grafts of French grape varieties on American rootstock that provide resistance to phylloxera, a disease that would have decimated the entire French vineyard without the transplant on resistant rootstock!
Common ways to graft
The two most commonly used types of transplants are Patch Graft :
Mostly used on fruit trees (citrus fruits and stone fruits), and cannabis : )
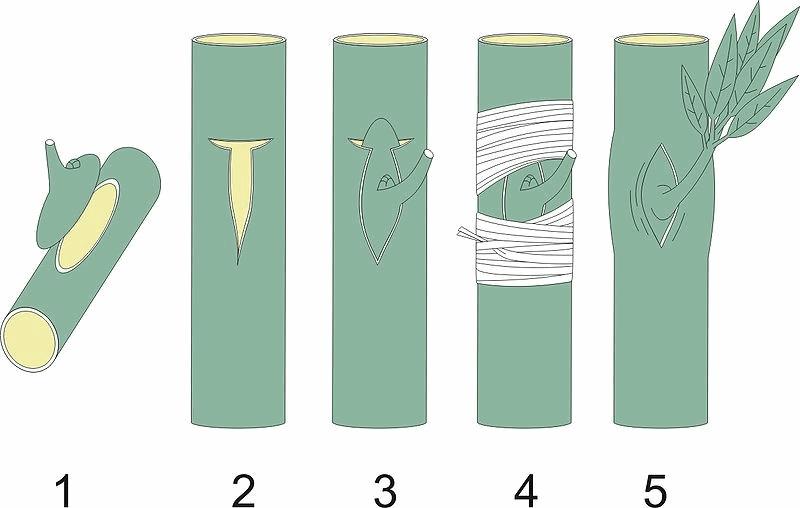
And Split Grafting :
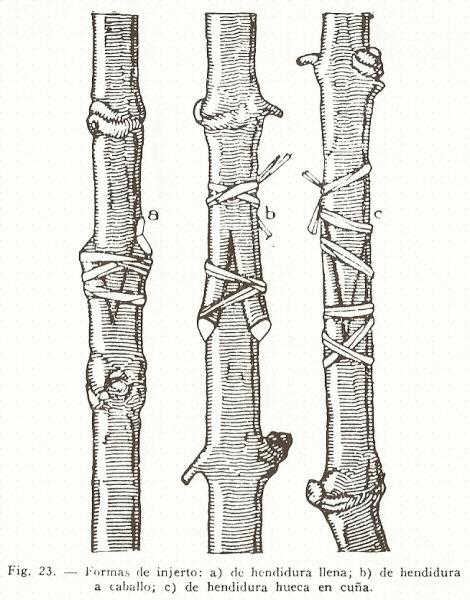
Which is the one I will use here as it is much simpler to use and has a high success rate.
There are many other types of grafts you can use (crown, inlay, chip-building, etc.), but the split grafting is my favorite method.
How to graft Cannabis.
Our goal is to have two marijuana varieties on one plant so obviously, you will need at least 2 or more different strain varieties.
Step 1:
Select the branch that is going to receive the plugin, It’s important that both ends of the graft have roughly the same size diameter or the graft is slightly smaller in diameter than the rootstock. Try to select “young” branches (2-3mm in diameter) that are not too woody and especially not hollow inside which greatly complicates the healing and the good sap supply of the graft.
This is the branch chosen to receive the plugin:
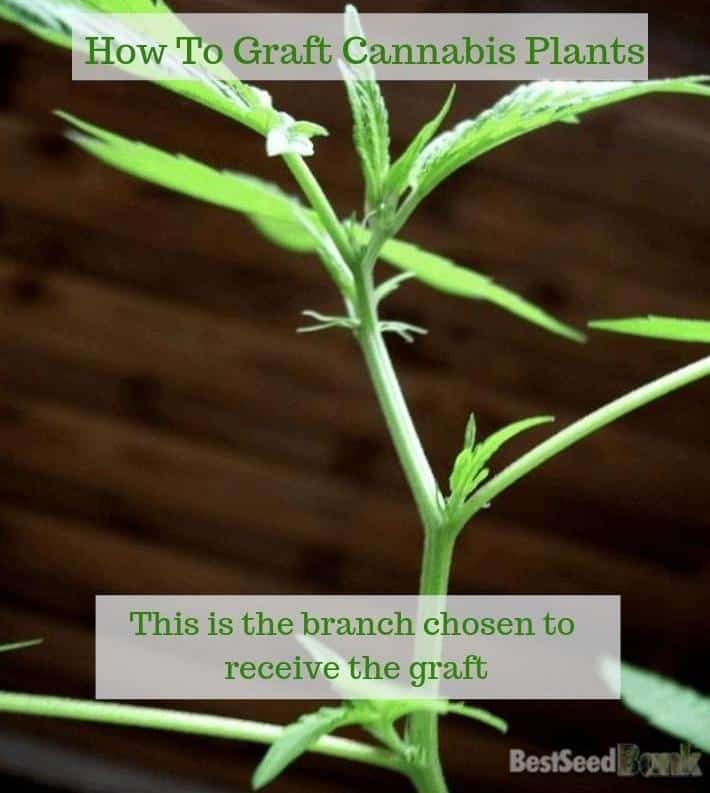
The graft is a young cutting end of a similar size

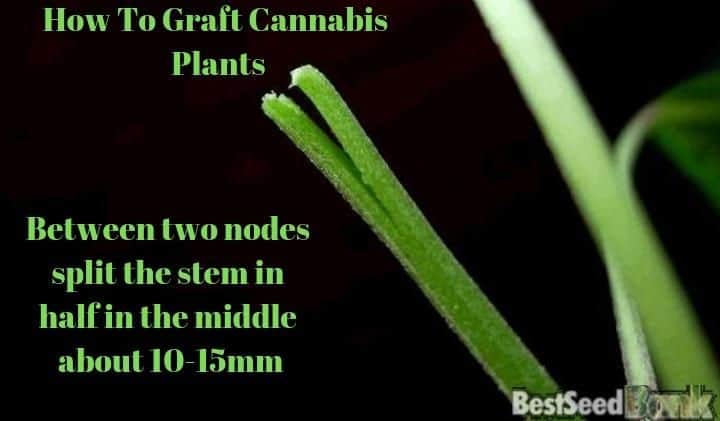
Step 2:
Cut the rootstock branch between two nodes and split the stem in half in the middle about 10-15mm
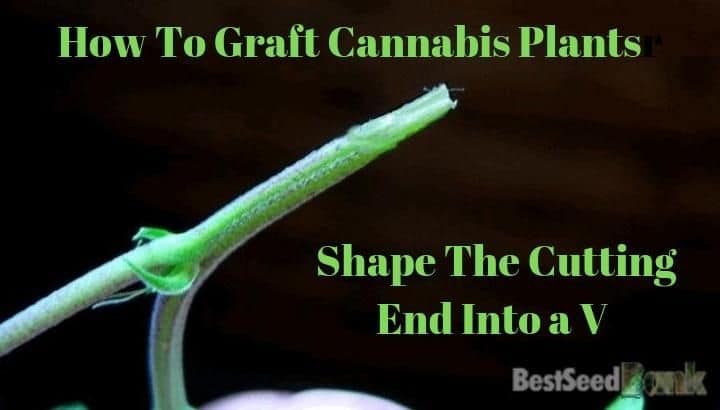
Prepare the graft a bit like a cutting, leaving only one or two leaves in addition to the apex and sharpening them.
Leave only 20-30mm of the stem under the lowest leaf and cut the bevel end about ten millimeters.
Step 3:
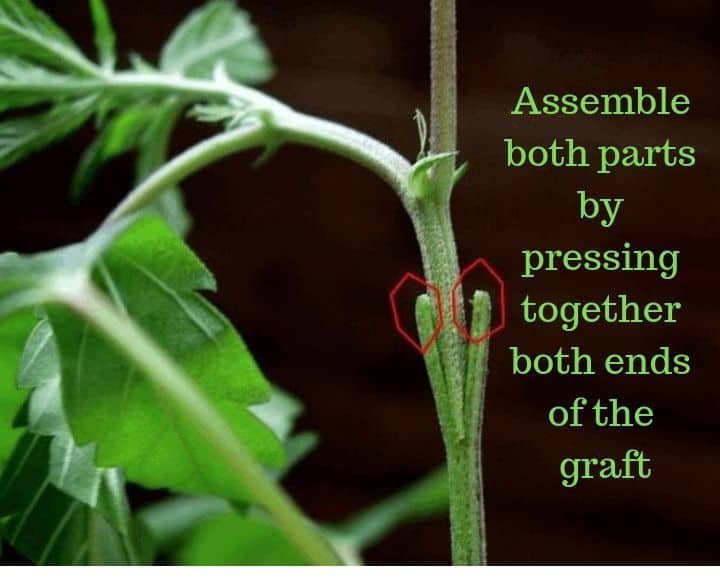
Assemble both parts by “pressing” the graft into the rootstock slot until its sat at the bottom of the slot.
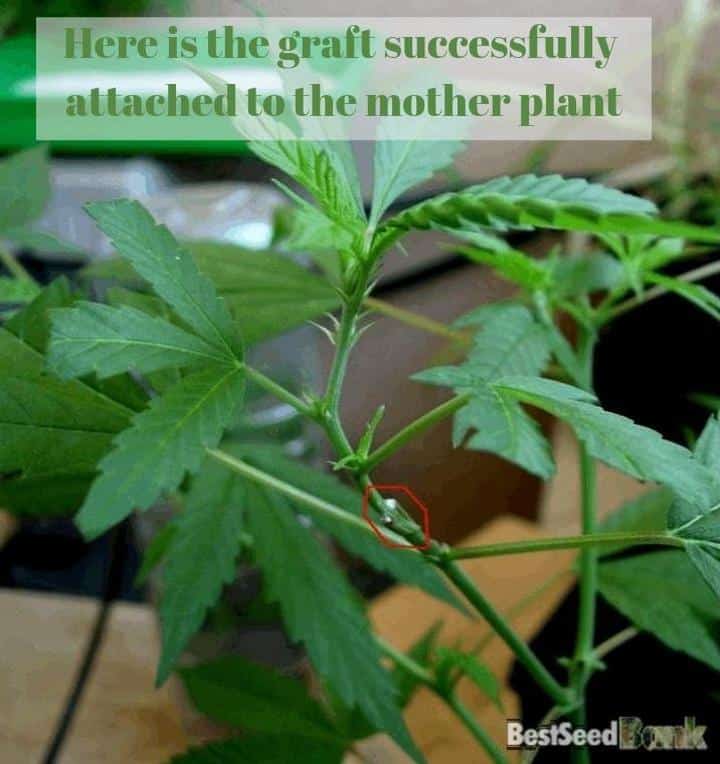
Hold both edges of the rootstock tight against the stem of the graft and drop a tiny drop of cyanoacrylate glue (superglue) on each side (red circle) to stick the edges of the “V” formed by the slit against the graft stem.
Hold for about 10 seconds for the glue to take hold. The graft should fit properly and there should not be “bubble” or gap between the rootstock and the graft.
Step 4:
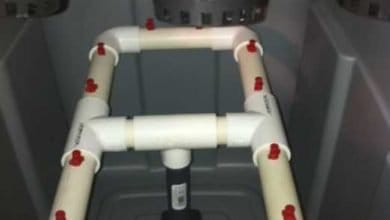
Spray the graft with water as you would on a young cutting, place the freezer bag (or any clear bag of a similar size) and close the zip up on either side of the stem as close as you can to keep the moisture in. The goal is simply to create a very humid atmosphere for the graft while the graft heals.
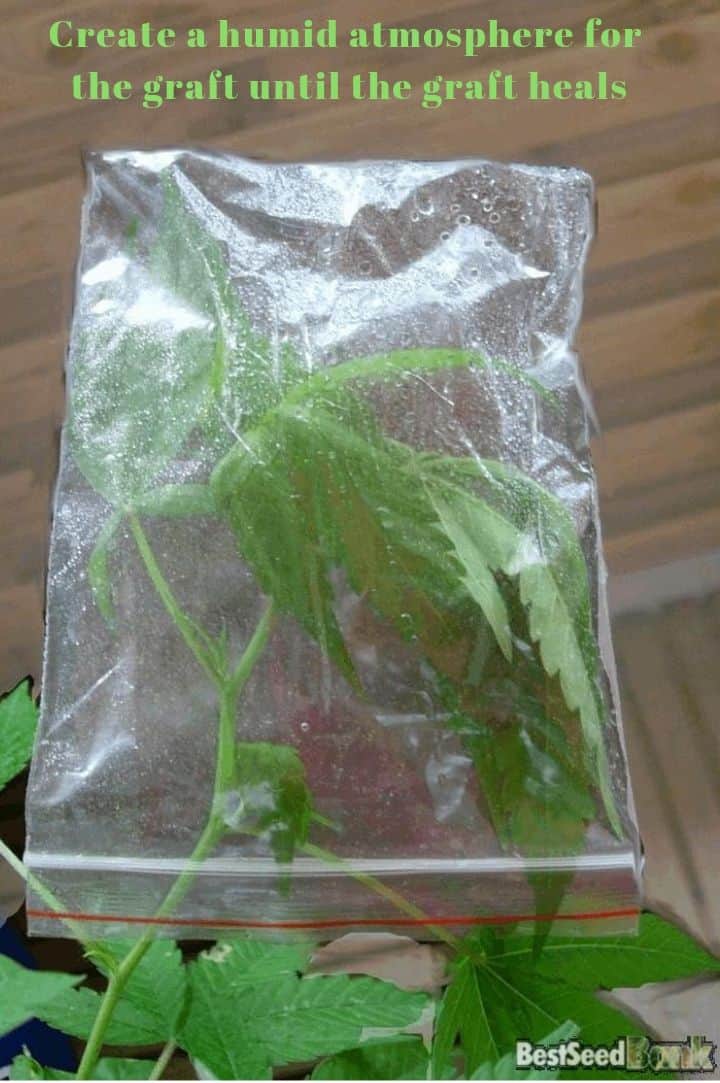
The graft is now complete, it is now necessary to wait for the two parts to heal together.
Keep the high moisture level in the bag by spraying water once or twice daily. To allow the leaves to breathe, it may be useful to cut the corners of the freezer bag to leave holes about 5-10mm in diameter which are very handy for putting a small spray on top and not having to take out the whole bag …
Things to watch :
In addition to moisture, it is important to cut off any secondary growth under the resulting grafting point. This is because they deflect the sap necessary for the successful healing of the graft. Do not over-water the rootstock to avoid drowning the graft under too much sap flow.
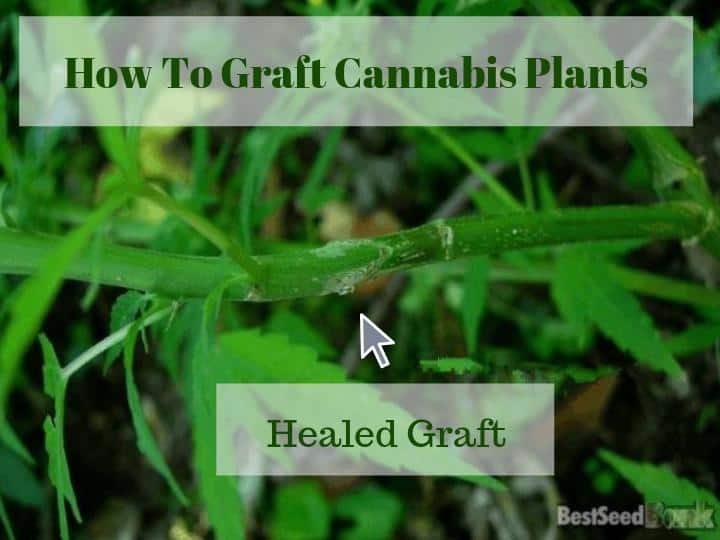
The finished graft:
After a few days if the graft is all stunted with the wilted stem (not just a little soft) it is likely that there has been a problem (poor contact with the rootstock most of the time) and that the graft is not taking properly. Remove the graft and start with a new one on a new branch or a little lower on the same branch if there is room (not in the same slot!).
Usually, in one or two weeks the edges of the slit have healed:
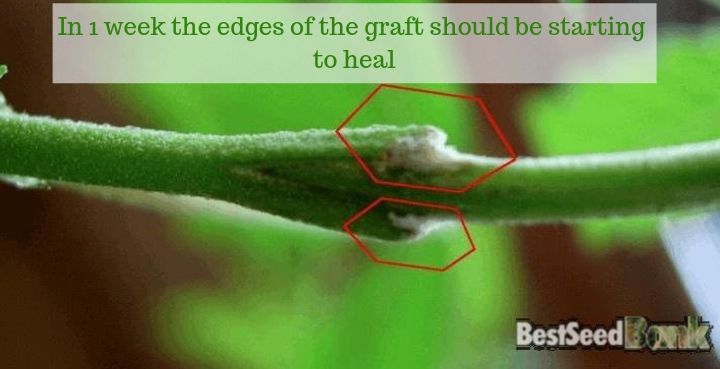
And the plugin starts to disappear:
So we now have a mother plant with two types of buds on the same plant. You could now proceed to do more grafts using the same technique to add more of your favorite cannabis strains onto one mother plant.
This means we can have several varieties on the same plant so less space, less watering etc …
In the case of growing outdoors, we can have more varieties but fewer holes to dig or water to bring and choosing the right rootstock can improve the resistance to drought and pests.


Ive looked read and watched most everything available on the topic of grafting the Cannabis plant online. this is by far the most concise and informative of the whole lot. all the others seem to be coming from almost a theory in that they lack the step by step multiple options and they certainly do not have the photos and diagrams included here. I knew this was the real deal when I read “super glue” not one of the others mentioned it and knowing from years of experience on people and animals how super glue is used it clicked that one could use it for grafting if you understood the basics of how it works.
Thank you for making and sharing this
You’re more than welcome, thank you for your kind comment, I’m glad it helped
cheers
Heath